Saturday, July 18, 2015

Making miniature towel cakes

Towel cakes are very popular these days. They are fun to make and they are practical gifts when taken apart later. An other brilliant thing about them is you can make the gift as expensive as you like by using more or less towels and they will always look wonderful. Plus they make great decorations at a wedding- or baby shower.


So I felt it was high time to try making this fun gift in mini. I made mine with a baby theme but you can change the theme by using different colors and different decorations.


You will need to adapt the “ ingredients “ a bit for the smaller cakes but they will look just as stunning as the full size ones.
One sided terry toweling is perfect. This has the little loops on one side of the fabric only. It is used for making baby clothes and also for doll making. You can also recycle baby clothes etc for this.

If you cannot find it there are other fabrics that will work very nicely : Fleece fabrics, micro fiber or terry toweling dish cloths from the dollar store.


Towel sizes :

Big towel 5 cm – 11 cm
Towel 4 cm - 9 cm
Washcloth 3 – 3 cm or 4 -4 cm .
But feel free to experiment with other sizes if you prefer.

Other materials you will need :
Tacky glue
Ribbon for wrapping around cake.
Hair elastics. I mean those really small ones that are very stretchy. I found mine at the dollar store
Some pins .
Scissors and ruler for cutting fabric


Your choice of materials to decorate your cake . I used a mini bow and on the other cake there is a matching set of cup, plate and tin plus a baby product in a bottle.


The size of the cake depends on the size of the towels you use and also on how many of them there are in the cake.

Let's make the blue towel cake

Step 1: Place a 4-9 cm towel flat on your work surface.

Step 2: Fold long sides to the middle .

Step 3: Fold the whole thing in half, length wise.
Tip : A real towel cake will be taken apart later but the mini version won't so to make things easier you can cheat and add a little bit of tacky glue to keep everything in place.

Step 4: Have a hair elastic at the ready and start rolling your towel into a cake shape. Try to keep the roll nice and tight. Place elastic around cake. Once again you may use some glue.

Step 5: Cut a piece of ribbon that fits nicely around your cake. Move the elastic to where the ribbon will not completely cover it, but do not remove it yet. Wrap the ribbon around the cake, hold tight or use a pin and remove elastic. Glue ribbon in place. Without the elastic the cake will have a better shape.

Step 6: Decorate your cake. I used a washcloth folded into a bunny and a cup , plate and tin with a bunny pattern. I added a bottled baby product as a final touch.


The big cake 

For this cake you will need to cut two towels size 4- 9 cm . The cake will look bigger because I have used terry toweling for this cake, which is thicker than the other fabric.


Step 1 : the first layer is created in the same way as the blue cake.

Step 2 : For the second layer you need a smaller towel. You can make this by cutting 4 cm off the second towel.


The cut off bit can be used as the washcloth for the top layer. The towel is folded and rolled in the same way as the blue cake.

Step 3: Use the piece you cut off in step 2. Fold in half and then fold in half once more. Roll into cake as before.


Step 4 : Add ribbon to cakes as for the blue cake.


Step 5 : Now it is time to stack the cakes. You can do this in several ways. If you want to do it like a real towel cake you can push a toothpick upwards through the center of the bottom layer and thread the other two on the toothpick to secure. You can also use a pin , but then you have to start at the top so the sharp point is hidden inside your cake.
But of course you can also just glue the layers on top of each other, no one will notice.

Step 6 : Decorate the top of the cake. I added a silk bow .


You can make endless variations on this cake . The white cake was made using two towels for the bottom layer and one for the second layer. White ribbon makes it look really elegant. Some little roses are all it needs for decorations.


For a real big cake use the big towel size or several of them for the first layer and then 1 big one for the second layer and a smaller towel for the top.

Have fun making these cakes .


Sunday, July 12, 2015

The best book about miniatures


I treated myself to this wonderful book by Christine Lea Frisoni. 
If you love shabby chic, and  all things French  it is a must have.

I cannot stop looking at it and I have even made a few things from the book .I love the hydrangea and rose patterns.


Here are some lovely pictures from the book .


There is also a lovely blog : called l'atelier de Lea. Check my list of great sites for a link.

Two years ago when I was in Paris I had planned to visit her shop in Montmartre.  Sadly when I got there the shop was closed  but | I did really enjoy looking at the things in the shop window.

 The shop in real life looks exactly like the miniature version in the book .......or is it the other way round ?

If you ever go to Paris try to visit this lovely shop. But even if you cannot visit the book and the blog are really  great too.

Wednesday, July 8, 2015

Knit the easiest baby outfit ever ( free pattern)


This is the easiest outfit for a 12 Th scale baby. It is just a matter of knitting two pieces without any decreasing on increasing and sewing them together.   Here is the basic pattern.
It is very easy to adapt . If your doll is a bit bigger or fatter than my Heidi Ott baby just cast on a few more stitches and add a few more rows.

You will need 1 mm knitting needled , DMC tatting thread and a sewing needle. 

Cast on 30 stitches.
Row : 1-2 Knit
Row  3-30 Stocking stitch ( K on right side, P on wrong side)
Cast off.

Close one shoulder seam. Put on doll .  Close the side seams leaving part of them open for armholes.   Check with photo below  Close the other shoulder seam and the crotch part.Check with photo below 

If you like , you can add a little bit of shape to the suit by working row 15 - 18 in Knit 1 , Purl rib, this will add a bit of a waist line .  When you thread a piece of thread through those rows and tie in the back it will look even better.


Basic knitted hat.

I made this to fit a Heidi Ott baby. But if your doll is bigger than you can just add a few more stitches . 25 stitches will fit a 1 1/2 inch baby. You can add more rows if  you feel like it. This is just a very basic pattern that is easy to adapt.

1 mm knitting needles.
DMC tatting thread your choice of color or similar
Sewing needle . 
Cast on 20 sts.
knit first 2 rows.
Row 1-12 .Stocking stitch ( Knit on right side, purl on wrong side)
Row 13 : knit two stitches together to shape hat
Row 14 : purl
Cut thread leaving a tail, thread tail through  sewing needle and pass through all stitches on the knitting needle. Gather closed and fasten off. Close back seam of hat and weave in all ends.


Saturday, June 27, 2015

I love crochet


I love crochet 
Miniature crochet is the best thing ever.

Most of all I like to design and make my own patterns
Today I am sharing  some things I made over the years.

Is not it amazing what you can do with just some thread and a crochet hook ?


Baby in seed pod.
Baby clothes, seed pod and flowers all done in crcochet.


Little crochet cat. . Worked in punch thread and brushed to make her look furry.


Crochet cake and pie.


 crochet pin cushion doll. The real of DMC tatting thread next to her shows the size.

Little outfit for 2 inch baby doll Eric.


Crochet cakes in different scales.  Real life and twelth scale cakes.


I think this crochet cat needs something ............


Winterwonderland outfit for Eric.


Variatons on my little Christmas doll .


Cat tea cozy .


Tuesday, June 16, 2015

Au panier fleurie, my little flower shop.


This lovely little flower shop, believe it or not, was once unwanted birdhouse. It was a bit battered and damaged and the owner of the store where I found it ,  told me it had been around for ages and  I could have it for  1 Euro.


It needed a new roof for starters. The two entry holes for the birds became two windows and then  I started to work on the rest of the place.


Base got covered in egg carton tiles outside and wood inside. I had to make a new greenhouse for the old one was too small to look right. Paint and  a fake front door made my shop  look a whole lot better.


Flowers and plants have been made  using real dried flowers, plastic, paper and silk flowers.


The orchid I made using a kit, topiaries   are my own design.


I really like the plant stand  I made out of a chess piece and some wood. The flowers in the vase are tiny dried flowers from my garden combined with paper ivy.

Cat hairs  on the right next to the flowers were provided by Taeggi . I only noticed this after I put the photos here.

Wednesday, June 10, 2015

Make a lovely pedestal .

 A pedestal or cake stand is a lovely way to make a cake, a flower arrangement or a precious object stand out.

I made this one a using a stone vase, some wooden discs and a paper punch. Add some glue and paint and there you are .


The parts you need : one vase or similar shaped item and two wooden discs.  On the right I have shown the discs on top of each other to show the difference in size.


Vase being glued to the wood discs, please note the vase is used upside down so glue the bottom to the wood.


I used a paper punch to cut out several motives. I used the curly shape at the bottom and the flower in the middle.


Curly things glued to the wood and tiny flowers added upside down.


Beginning to  look   a bit better after a coat of primer.

Painted black with a little bit of silver eye shadow rubbed over it.


The dome is a plastic bottle cap. I glued a metal plate to the top , once again upside down. The ornament on top is the lid of a  kettle .  I only had the lid and the kettle has been missing for ages. But I think it looks just right here. Painted it black and rubbed on some silver eye shadow  again. You can replace the lid with a bead or jewelry finding.
Two variations made in the same way . The second dome has a glass button and a stick on  gem stone on top.

I love the mummy head in the dome....

Saturday, May 30, 2015

Cake stands


If you have a box full of bits and pieces  and want to have some fun with them, try making some cake stands. They are fun and easy to do and they can fit into many of your projects.


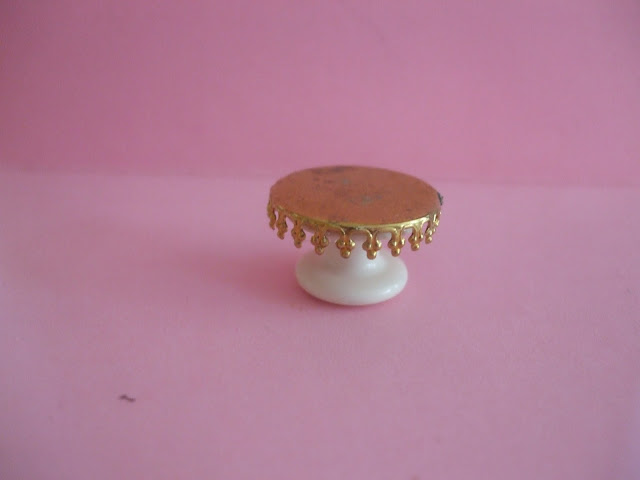
 Here is linen button and a jewelry finding  combined into a cake stand. How easy is that ?


I don't want to make you hungry right away so I did not add a cake but some flowers.


Even easier :  a small plate , a mug placed upside down on top of it and a saucer to finish it off. Voila a cake stand for one.


This time I added some of my no clay cakes.


Two matching plates and a glass also work very well. You can use a clear glass of course and use different sizes of plates 


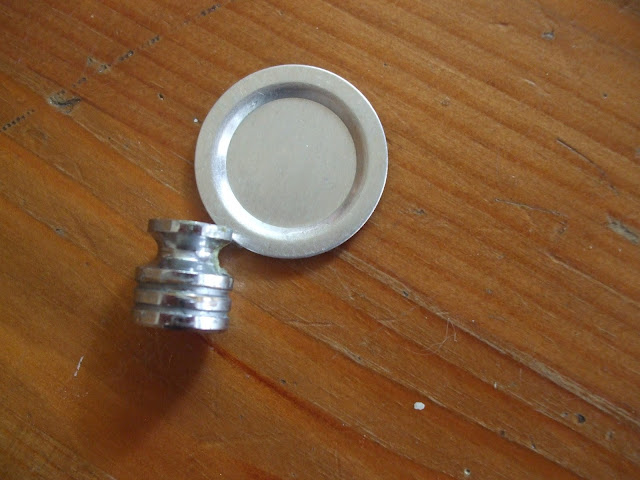
A metal plate combined with a metal thingy. I really have no clue what it is, but it was in my box and it worked very well with the plate.


Does not it look classy with a dome and some fruit added to it ?


Next time I will tell you all about making more stands and the domes as well.