Thursday, September 15, 2016

At last ......the pattern for the mini angel for the christmas tree.

 For a long time Blogger did not pass on any of the comments to this blog. So I did miss the fact that some of you did ask for the pattern for my little mini angel for the Christmas tree.


Angel shown with my fingers for scale.


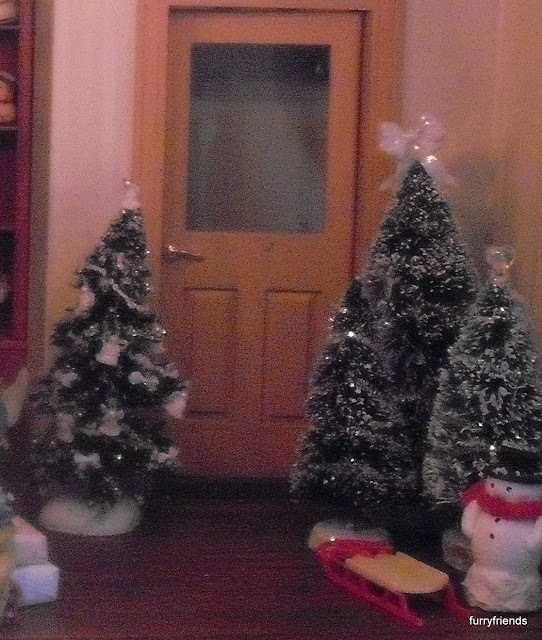
Several of my angels in the tree on the left in this photo.


I have been a very good girl today and right  after breakfast I sat down, made two angels and wrote down how I made them.

I hope they are worth the wait !

The angels are done in crochet and please note that if you have not got a bit of crochet experience it would be best to first try making one with regular yarn and a matching crochet hook first , Size does not really matter as long as it is bigger than the really tiny stuff . Believe me this is fiddly stuff even if you are used to mini crochet.

For mine I used :
crochet hook 0,60 mm
DMC tatting thread in white or a similar thread
Tacky glue
Needle
Small pearl bead.
 ultra fine glitter ( optional )
Fabric stiffener of your choice ( optional)

Angel is worked in rounds. Rounds are not closed so please use  a marker ( like a piece of colored thread) to keep track of your rounds.  They are supposed to look like a little bell shape when they are finished. Another comment : I have made tons and even though I follow the pattern  they all look different just like real angels would !

Start with a magic  circle and work 6 sc into the circle.
Close the circle by pulling the thread and working  slip stitch.
Round 1 : work 2 sc in each stitch. Take your time ! And yes saying bad words is allowed.
Don't close the round !
Row 2- 6 :  This is going to be easier : work 1 sc in each stitch and do not close the rounds.

Row 7 :  2 sc in each stitch. , finish off and cut thread. This will add a ruffle to the skirt.

Feel free to experiment with the number of stitches and the number of rows and even the tip of stitches. This is just a very basic pattern to start with. The possibilities are endless.


                                             Showing the basic shape for the angel.


I did use some fabric stiffener on mine for I wanted them to stand up and look a bit crisp but you can use them as they are.
Weave in all lose ends before you add the fabric stiffener.  Leave to dry.

For the head : Glue a tiny pearl bead to the top of the bell shape. The hole in the bead can be used to add a loop for hanging your angel. Just thread a piece of  yarn through the hole and the body and back and tie together.. To camouflage the hole in the head ( also when you are not doing a loop) apply some ultra fine glitter to the head for hair. You can also use bunca or yarn for hair.

To make the wings :

Chain about 16 chains. Check on your angel if you feel this is the right size for your angels wings . If you want them smaller 14 chain will be nice, if you want them bigger,  try 18-20 chains,

Make the chain into a circle using a slip stitch. Fasten off and knot the threads together. I always add a little bit of glue to the knot.

Glue the knot to the back of your angel and then glue the top of the circle to the knot so you end up with two loops one at each side of the body.


And there is your tiny little angel.


Tuesday, September 13, 2016

I am so sorry

To everyone who wrote nice comments to my blog : so very sorry for not reacting !!

What happened is : Blogger did not show any comments all summer so  I did not see them. Suddenly today I got a ton of them in my mailbox.

I am very grateful for all of them and I am enjoying them so much. But...Blogger will not allow me to reply on the blog. So I cannot send any reactions to comments or questions.

So if you have asked a question and did not get a reply that is the reason. I feel very bad about this.
Please drop me a line if you have something to ask or tell that is important to you "
furryfriends@onsnet. nu will do the trick.


Saturday, September 3, 2016

The book is for sale


A wonderful fully illustrated, step-by-step, 30 page Ebook in PDF format by Marianne Colijn.  Great miniature desserts made with common objects you might find around the house-- no polymer clay needed! 


 Very creative and lovely desserts where even a beginner can get great results.   Tarts, cakes, petit fours, pies...LOTS of treats.


You can order  it as an ebook from my favourite mini shop online :
.http://www.minikitz.com


http://www.minikitz.com/ZenStoreP1/index.php?main_page=product_info&products_id=2364#.V8lTue1zMEI.facebook

Saturday, August 6, 2016

Button cakes


Button cakes 
So much fun to make and so very easy.


  The ingredients are very simple :

Some pretty buttons with a flat back,

 Acrylic paint in a nice pastry color

  Window color ( glass )  paint to add a nice finish. Brown glass paint is perfect for this.


I have tried the stuff from the dollar store as well as  Window Color by Plaid.  The Plaid gives a somewhat better result but if you are only going to make like one or two cakes the cheap stuff is fine.


Select a nice button and paint with the acrylic paint. Leave to dry.


If you feel the cake is too thin/flat you can glue a wood disk or a ring or something to the back to make it look better. Do not forget to paint this too.


Paint the raised areas with some glass paint to  add a nice shine and more definition to your cake. Hide the holes in the middle under some fruit or cream. I used some Aleene's  True snow for the cream.


The flower shaped  cake    use the button at the  top left in photo )


To make this pretty cake you will need the same ingredients as before plus  :
Some red no hole beads and red glass paint.

Make the cake as before and when the glass paint has dried fill paint the holes in the cake with some red glass paint. Sprinkle some red no hole beads on top. Leave to dry. Finish with a little dab of glass paint ( red!) on top of the beads for the final effect.


Monday, May 23, 2016

Some fun for the garden

Even though it is raining cats and dogs  today. I still made something for the garden..........well the mini garden that is.


Can you believe this lovely little garden fairy was once a cheap rubber doll ?


Other than the doll your will need some bunca and Tackly glue. Scissors and a bit of patience come in handy too. . You can add some little decorations like I did :  some plastic berries, flowers and  a sequin for a butterfly.
And you will need grey and white paint.


To "dress"the baby : unravel a length of bunca and  wrap and glue bunca where you want the clothes to be. Do not use too much glue or you will lose the fluffyness.

Leave to dry very well, preferably overnight.

Glue on any decorations you want to use. I found a rejected crochet hat that looks pretty good.  Note to self : Remember to never through anything away LOL


Paint the whole ensemble with grey paint and leave to dry. Dry brush with grey paint mixed with white and leave to dry. For a final touch dry brush with white paint. This will add a bit of depth and texture.

I was pretty pleased with her so I made two more in the same way.
 Now all I need is a garden for them to go in .LOL

Hope you will like them.


Thursday, May 19, 2016

Little projects with linen buttons


I am pretty sure there will be people around who have never seen one of these and have no clue what they are. They are old fashioned linnen buttons , used to close pillow cases etc. They could be removed before washing stuff.


A friend gave me a whole lot of them ( yes you can still buy them ) and she challenged me to come up with a quick little project for them so here we go :


  Ribbon or lace, some pretty pics ( optional) , linnen buttons and tacky glue.


Wrap some lace or ribbon around the center of the button and glue in place. Add the little pictures if you like and you are done.


Makes really pretty reels for lace and ribbon. Would not they look charming on the counter in a shop ?


A more vintage looking linnen button and a jewelry finding make a  cute little cake stand.

Finding is glued on top of the button up side down. And there  you are. If you feel like me there is a little too much gold going on: just dry brush with some white paint.


Shown at the front with some of my no clay treat on it.


Monday, May 9, 2016

Shabby chic decorations with dolies


  Doilies  are  back in fashion. They are fun to make and there are lots of new things you can do with them other than just having them lay on a table.


Last week I made some mini bowls using little dolies and fabric stiffener and they turned out really well.


So I decided to try something else : making an etagere out of stiffened doilies.  I am pleased with the result  so here is my how to for it.


What you will need :


 Two stiffened mini doilies. It is best if  one is bigger than the other but  you can use two that are the same size as well.
One  earring post ( thingy at the top right)  
Two of the cup shaped things that come with the earring posts to keep everything in place.
Piece of wire with a  loop at one end.


Earring post goes through center of doily.

 Cup shaped  thingy goes on  the post  to keep doily in place.


Second cup thingy goes on the post too but upside down. The post is now hidden.


Still wobbly but taking shape. Second doily on top of the cup thingies and then the  wire goes  through the top doily  into the whole of the top  cup to keep it all in place. A bit of glue might help too.


Looking much better now , right ?


Add some cakes  to finish !